How You Can Cook Steak on a Non-Stick Pan Step by Step
To cook steak on a non-stick pan, start by bringing your steak to room temperature and patting it dry. Season generously with salt and pepper, then place the steak in a cold pan over medium-high heat to prevent sticking and smoke.
Sear each side for a few minutes, flipping regularly for even browning. Use a meat thermometer to check doneness, then rest the steak to lock in juices.
Keep following for tips on perfect searing and pan care.
How to Thaw and Get Your Steak Ready to Cook
Before you start cooking, thaw your steak in the refrigerator for 24 hours to guarantee it defrosts evenly. This slow thaw prevents the center from remaining frozen, ensuring your steak cooks uniformly.
About 30 to 40 minutes before you plan to cook, take the steak out and let it come to room temperature. This step helps the steak cook more evenly and develop a better sear.
Once at room temperature, pat the steak dry with paper towels to remove excess moisture, which can hinder browning. Finally, season your steak with salt, pepper, or your favorite spices.
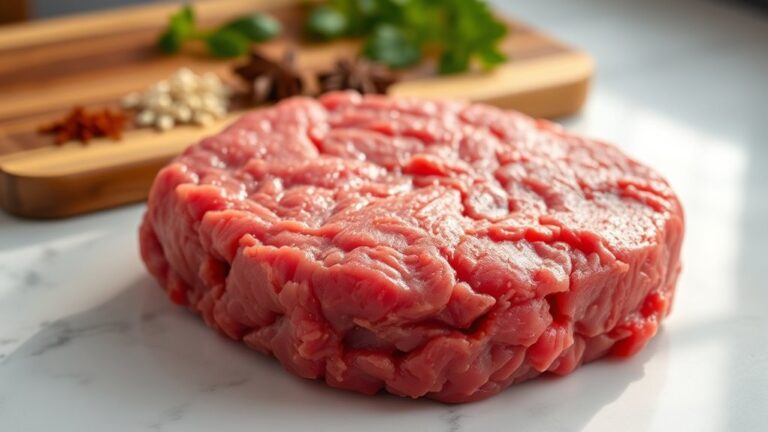
Which Steak Cut Works Best for a Non-Stick Pan

When choosing a steak for your non-stick pan, aim for cuts about 1 to 1.5 inches thick to get the best sear without overcooking. Marbled cuts like ribeye work great because the fat renders nicely, creating a flavorful crust without sticking.
Thinner steaks like flank or sirloin also cook evenly and quickly, making them perfect for non-stick cookware.
Ideal Steak Thickness
Although you might be tempted to cook a thick steak in your non-stick pan, choosing cuts that are around 1 inch or less works best for even cooking and quick searing. Thinner steaks heat through evenly without risking burning or damaging the pan’s coating.
To get the best results:
- Pick steaks about 1 inch thick or thinner for consistent doneness.
- Avoid cuts thicker than 1.5 inches unless you plan to finish them in the oven.
- Choose uniformly thick steaks to ensure even searing in your non-stick pan.
- Opt for cuts like sirloin or petite tender that cook quickly and evenly.
This approach helps you avoid uneven cooking and keeps your non-stick pan in great shape while delivering a perfectly cooked steak every time.
Best Marbled Cuts
Three cuts stand out as the best choices for cooking steak in a non-stick pan: ribeye, New York strip, and Porterhouse. You’ll want to choose cuts with good marbling, like a ribeye steak, because the intramuscular fat melts during cooking, helping you achieve a rich flavor and a beautiful crust without adding extra oil.
The marbling in these steaks renders enough fat to promote excellent browning, making them ideal for non-stick pans. Avoid leaner cuts like sirloin or tenderloin here, as they lack sufficient fat to develop that tasty sear.
Season Steak for Maximum Flavor Without Oil
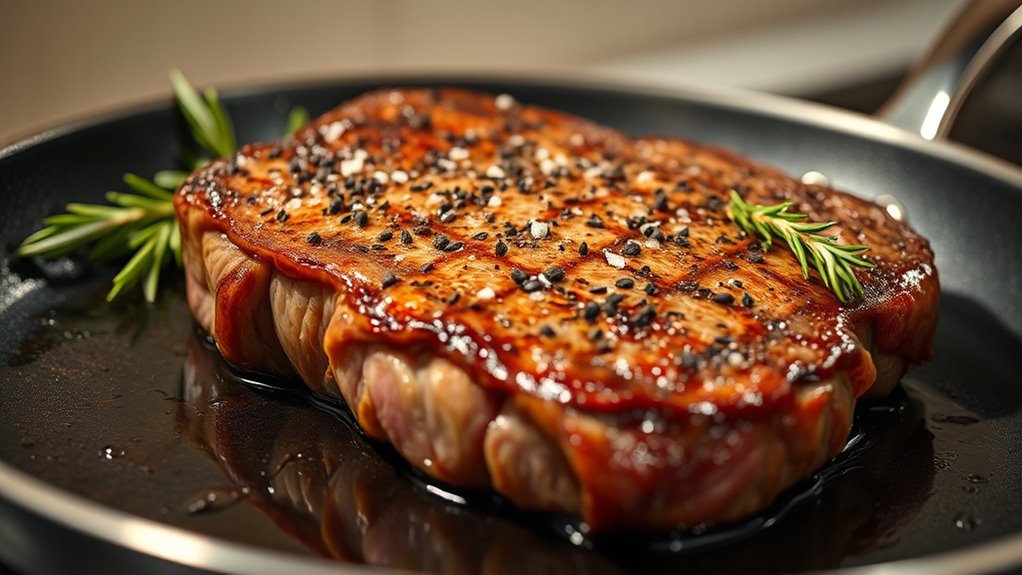
You’ll want to season your steak generously with salt and pepper to build flavor and create a nice crust without oil. Timing matters—sprinkle the salt just before cooking or let it rest after seasoning to let the flavors soak in.
Adding herbs like rosemary or thyme can boost aroma and taste while you sear.
Selecting The Right Seasonings
When seasoning steak for a non-stick pan, start by generously applying salt and pepper to boost flavor and encourage a rich browning. To select the right seasonings, follow these steps:
- Choose coarse salt and freshly ground black pepper for a bold base.
- Add garlic powder, onion powder, and smoked paprika to deepen the flavor profile without needing oil.
- Season the edges as well as the surface to ensure every bite is flavorful.
- Apply seasonings just before cooking to keep the steak moist and develop a savory crust.
This approach enhances seasoning penetration and maximizes flavor, especially if you dry brine by salting and refrigerating the steak for at least 30 minutes beforehand.
With these seasoning choices, your steak will be perfectly tasty on your non-stick pan.
Salt Timing And Technique
Although it might seem tempting to salt your steak right before cooking, applying salt at least 40 minutes in advance reveals deeper flavors and a better crust. When you salt early, the salt first draws out moisture, then that moisture reabsorbs, enhancing tenderness and seasoning throughout the meat. Make sure to salt both sides evenly, including the edges, for balanced flavor.
Avoid salting just before cooking, as it can prevent proper browning and crust formation. Before searing, pat the steak dry with paper towels to remove excess moisture—this step is vital for achieving maximum caramelization on your non-stick pan. Mastering salt timing and technique ensures your steak develops a rich, flavorful crust without needing oil, elevating your pan-cooked steak every time.
Enhancing Flavor With Herbs
Even without oil, you can boost your steak’s flavor by seasoning it generously with salt and pepper before cooking. Herbs play a key role in enhancing taste naturally. Here’s how to use them effectively:
- Add fresh herbs like rosemary or thyme into the pan during the last few minutes to release their aroma.
- Finely chop or crush fresh herbs and sprinkle them over the steak right after searing for maximum absorption.
- If you only have dried herbs, include them earlier in cooking to let their flavors fully develop.
- Rest the steak after cooking to allow the herbal seasoning to settle into the meat.
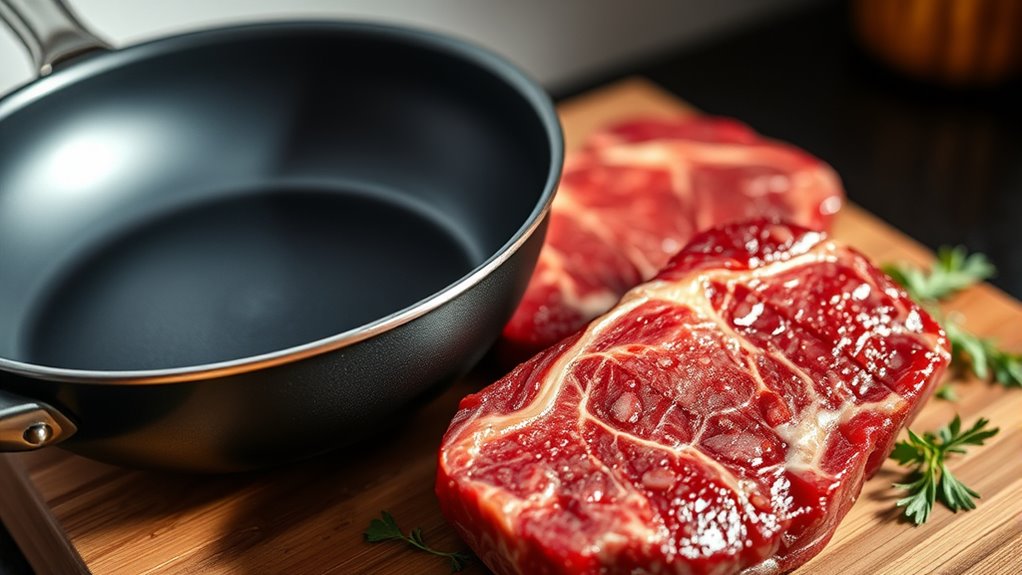
Why You Should Start With a Cold Non-Stick Pan
Starting with a cold non-stick pan helps you minimize smoke and splatter by preventing oil from heating too quickly. When you place steak in a cold pan, its natural fats render gradually, promoting even browning without sticking or damaging the non-stick surface.
Plus, skipping preheating simplifies cooking and saves time. Gradually heating the pan with the steak inside gives you better control over the sear and crust development.
| Benefit | Why It Helps |
|---|---|
| Minimized Smoke | Slower oil heating reduces vapor |
| Even Browning | Fats render gradually |
| Non-Stick Protection | Avoids tearing coating at contact |
| Time-Saving | No preheating needed |
| Better Crust Control | Controlled, gradual searing |
Using a cold pan is a smart, efficient way to cook steak perfectly on your non-stick pan.
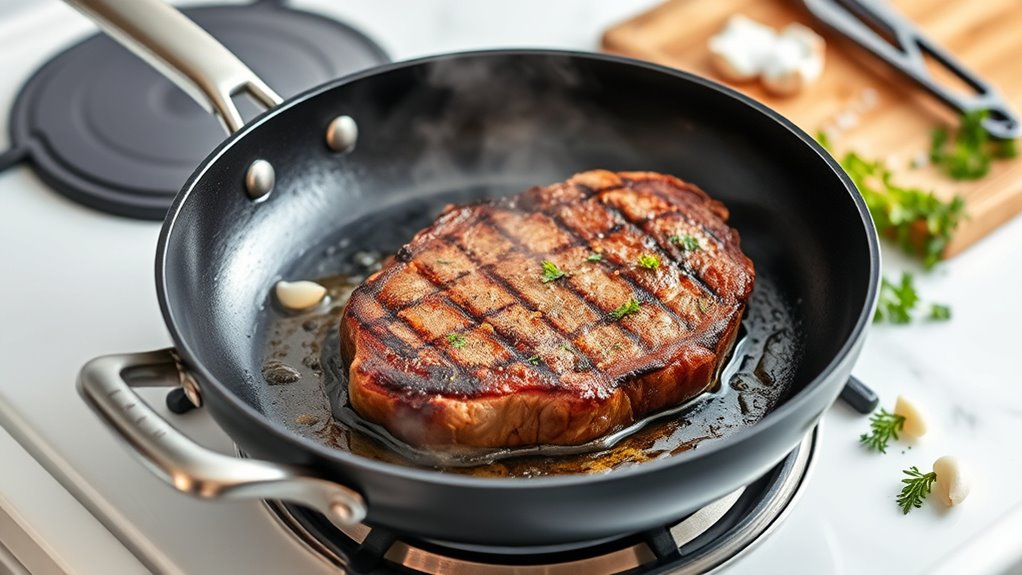
How to Sear Steak in a Non-Stick Pan
To sear steak perfectly in a non-stick pan, start by choosing one with a sturdy base that heats evenly. Make sure to pat your steak dry and begin with a cold, dry pan to help form a good crust.
Then, manage your heat carefully and time each side properly to get that ideal sear without overcooking.
Choosing The Right Pan
When you want to sear a steak perfectly in a non-stick pan, choosing the right pan is essential. Not every non-stick pan can handle the high heat needed for a great sear. Here’s what to look for:
- Pick a high-quality non-stick pan rated for high heat to ensure even searing.
- Choose a pan size that fits your steak comfortably, allowing full contact with the surface.
- Make sure the pan’s surface is clean and dry—no residue—to promote a flavorful crust.
- Avoid overcrowding the pan; this helps maintain consistent heat and better browning.
Preheat your pan on medium-high to high heat for about 5 minutes before cooking. This prep guarantees a delicious, well-seared steak every time.
Preparing The Steak Properly
Although using a non-stick pan requires some adjustments, you can still achieve a perfect sear by preparing your steak properly. Start by patting the steak dry with paper towels to remove moisture; this step is vital for a good crust. Then, season the steak generously with salt, pepper, or your favorite dry rub to enhance flavor.
Preheat your non-stick pan over medium-high heat for about five minutes until it’s hot enough to sizzle. Place the steak in the cold, un-oiled pan, ensuring full contact with the surface to promote even browning. Avoid overcrowding the pan—leave enough space around the steak so it sears properly instead of steaming.
Proper preparation sets the foundation for a delicious, evenly cooked steak.
Managing Heat And Timing
Even if non-stick pans aren’t traditional for searing, you can still achieve a perfect crust by carefully managing heat and timing. Start by preheating your pan over medium-high heat for 5 minutes to reach ideal searing temperature.
Then:
- Place the steak in the cold, dry pan and immediately turn the heat to high heat to start searing.
- Flip the steak every 2 minutes to ensure even cooking and prevent burning.
- After the initial sear, reduce heat to medium to control cooking pace and avoid over-browning.
- Use a meat thermometer to pull the steak about 5°F below your target temperature, accounting for carryover heat.
Mastering this timing and heat balance ensures a juicy steak with a beautifully seared crust on your non-stick pan.
Control Heat for a Perfect Steak Sear Without Smoke
To get a perfect sear on your steak without filling your kitchen with smoke, you need to control the heat carefully. Start by preheating your non-stick pan over medium-high heat for about five minutes until it’s hot enough to sear. Avoid adding oil before heating; instead, place the cold steak directly into the pan to minimize smoke and splatter.
Once the steak develops a crust, reduce the heat from high to medium to prevent burning. Keep an eye on the pan’s surface temperature, adjusting as needed to maintain consistent heat. Using a high-quality non-stick pan designed for high temperatures helps you control heat effectively, ensuring a perfect steak sear without damaging your cookware or creating excess smoke.
When and How to Flip Steak for Even Cooking
When you flip your steak every two minutes, you guarantee both sides brown evenly and develop a rich, caramelized crust.
To master this, follow these steps:
- Sear the first side until you see a deep color and juices bubble on the surface.
- Flip the steak gently to avoid tearing the meat.
- Use a timer or watch to keep flipping every two minutes, ensuring consistent searing on each side.
- Avoid flipping too often; every 1-2 minutes lets the steak form a perfect crust without overhandling.
Use a Meat Thermometer to Check Steak Doneness
Monitoring the internal temperature is the most reliable way to guarantee your steak reaches the perfect level of doneness. Use a meat thermometer by inserting it into the thickest part of the steak, avoiding bone or fat.
Remove the steak when it’s about 5°F below your desired level of doneness to account for carryover cooking. Keep the thermometer in while resting to track the temperature rise. Check regularly during cooking to prevent overcooking.
| Doneness | Temperature (°F) |
|---|---|
| Rare | 125 |
| Medium-Rare | 135 |
| Medium | 145 |
| Medium-Well | 155 |
| Well-Done | 165 |
Why Resting Steak Matters and How Long to Wait
Although you’ve just finished cooking, letting your steak rest for 5 to 10 minutes is essential for locking in its juices and flavor. Resting steak allows the juices to redistribute evenly, boosting juiciness and tenderness.
Here’s why you shouldn’t skip this step:
- Juices settle back into the meat fibers, preventing them from spilling out.
- The internal temperature rises by 3 to 5°F due to carryover cooking, finishing the cooking process.
- Meat fibers relax, making the steak more tender.
- Cutting immediately causes moisture loss, resulting in a dry bite.
How to Clean Your Non-Stick Pan and Protect Its Coating
To keep your non-stick pan performing well and lasting longer, you need to clean it carefully and avoid damaging its coating. Always let the pan cool completely before cleaning to prevent warping and protect the surface. Use a soft sponge or cloth with warm, soapy water for cleaning—never abrasive scrubbers or steel wool, as they can scratch or strip the coating.
Avoid harsh chemical cleaners, which can degrade the non-stick layer. During cooking and cleaning, don’t use metal utensils because they can cause scratches. Regularly inspect your non-stick pan for any signs of peeling or damage; if the coating is compromised, replace the pan to ensure safe cooking.
Proper cleaning habits will keep your pan in great shape and make cooking steak easier every time.
Frequently Asked Questions
How to Cook Steak on a Nonstick Pan?
You season your steak, place it in a cold non-stick pan, then heat it high to sear. Flip every two minutes, check temperature for doneness, and rest it five minutes before serving.
How to Cook a Steak on a Pan Step by Step?
You know what they say, “strike while the iron’s hot.” You’ll season your steak, sear it on high heat, flip every two minutes, check temp, then let it rest before slicing for juicy perfection.
Is It Okay to Cook Steak in a Normal Non-Stick Pan?
You can cook steak in a normal non-stick pan, but avoid high heat to prevent damaging the coating. Use medium heat and thinner cuts for best results, and always follow your pan’s temperature guidelines carefully.
Cooking at medium heat helps maintain the integrity of the non-stick surface while still allowing the steak to cook evenly. Thinner cuts will cook more quickly and reduce the risk of overcooking or burning.
Always monitor the pan’s temperature to ensure you stay within safe limits for your specific cookware. This approach will help you achieve a tasty steak without compromising your pan.
What Is the 3 3 3 3 Rule for Steaks?
The 3-3-3-3 rule means you sear your steak for 3 minutes per side, then let it rest for 3 minutes.
It’s a simple guide to get a medium-rare steak, especially with a 1-inch thickness.
Conclusion
Now that you’ve mastered cooking steak on your non-stick pan, you’re ready to impress like it’s the Renaissance all over again—except with a spatula, not a lute. Remember, patience and the right technique make all the difference.
Keep your pan cold to start, season well, and always let your steak rest before digging in. Follow these simple steps, and you’ll enjoy a perfectly cooked steak every time, no fancy grill required!
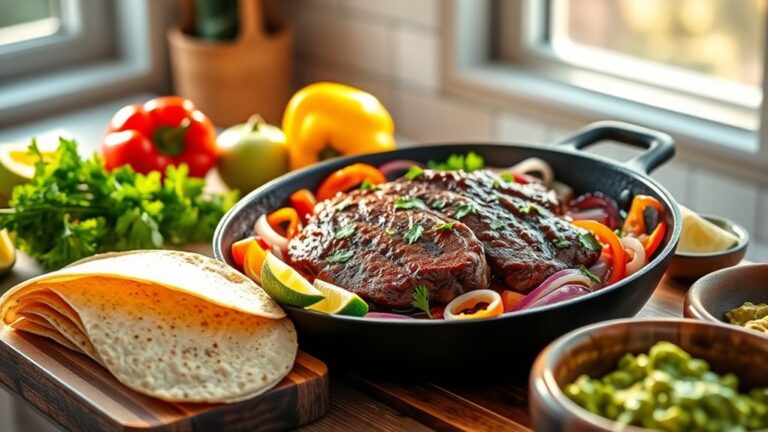
By using a non-stick pan, you can cook steak to perfection with ease. Whether you’re aiming for a juicy medium-rare or a well-done finish, the right method ensures delicious results every time. Cooking steak on a non-stick pan is a convenient and effective way to enjoy a restaurant-quality meal at home.