How You Can Brown Butter Safely in a Nonstick Pan
You can brown butter safely in a nonstick pan by using medium-low heat and stirring constantly to prevent scorching.
Cut the butter into small pieces so it melts evenly, and rely on the nutty aroma instead of color since nonstick interiors are dark.
When it smells just right, remove it from heat to avoid burning.
Choosing the right pan and managing heat well are key to perfect browning.
Keep going to discover tips for pan selection and handling burnt butter.
How to Brown Butter Safely in a Nonstick Pan
Although nonstick pans aren’t ideal for browning butter because they make it harder to monitor color changes, you can still do it safely by using medium-low heat and stirring constantly. Start by melting the butter gently in your nonstick pan, then keep swirling or stirring to distribute the heat evenly. This prevents hot spots that might scorch the butter or mask the subtle shifts in color you need to watch for.
Pay close attention to the butter’s color and aroma—the moment it turns golden brown and fills your kitchen with a nutty scent, remove it from the heat immediately. This careful attention helps you avoid burning while achieving that perfect browned butter flavor, even in a nonstick pan.
Why Browning Butter in Nonstick Pans Is Challenging

When you brown butter in a nonstick pan, it’s tough to control the heat precisely, which can easily lead to burning. The dark surface makes it hard to see the butter’s color change, so you might miss the perfect moment.
These challenges mean you have to stay extra alert to avoid ruining your butter.
Heat Control Difficulties
Because nonstick pans often have dark surfaces and uneven heat distribution, you’ll find it tough to monitor and control the butter’s browning process. The nonstick pan’s low thermal conductivity means heat doesn’t spread evenly, creating hotspots that can quickly burn your butter if you’re not careful. This uneven heat makes precise heat control difficult, forcing you to cook at lower temperatures for longer periods to avoid scorching.
However, lower heat slows down the browning process, which can prevent you from achieving the perfect caramelization. Since nonstick coatings retain heat differently than other pans, you’ll need to stay attentive and adjust your heat frequently. Mastering heat control in a nonstick pan takes patience and practice to ensure your butter browns safely and evenly.
Color Monitoring Challenges
Since nonstick pans usually have dark, non-reflective interiors, you’ll struggle to see the subtle color changes that signal perfectly browned butter. The opaque surface hinders accurate color monitoring, making it tricky to identify when the milk solids reach that ideal nutty brown.
This can cause uneven browning since you can’t easily track caramelization visually.
| Challenge | Effect | Why It Matters |
|---|---|---|
| Dark Interior | Hard to see subtle color shifts | Miss the perfect brown stage |
| Non-reflective Surface | Obscures visual cues | Increases browning difficulty |
| Opaque Coating | Hampers color monitoring | Leads to uneven browning |
| Lack of Light Background | No easy contrast for color | Makes judging doneness tough |
You need to be extra attentive when browning butter in nonstick pans because color monitoring is inherently challenging.
Risk Of Burning Butter
Although nonstick pans offer convenience, they make browning butter risky due to their dark surfaces and uneven heat distribution. You might struggle to spot the perfect golden hue, increasing the chance of burning butter.
Plus, the coating affects heat conduction, causing uneven browning and rapid burning of milk solids without warning. To brown butter safely in a nonstick pan, focus on:
- Careful heat control—keep the temperature low to avoid overheating and damaging the pan.
- Frequent stirring—to ensure even heat exposure and prevent hot spots.
- Close attention—since the usual visual cues are harder to see, rely on smell and timing.
Mastering these steps helps you avoid burning butter and preserves both flavor and your pan’s integrity.
Choosing the Best Nonstick Pan for Even Butter Browning
When you want to brown butter evenly, picking the right nonstick pan makes all the difference. Opt for one with a light-colored interior so you can clearly see the butter’s color changes, ensuring even browning without guessing. A pan with a flat, wide surface distributes heat uniformly, preventing hot spots that burn butter and spoil the nutty aroma you’re after.
Make sure your nonstick pan’s coating is high-quality and intact, so the butter won’t stick and you can stir easily. Use medium-low to medium heat to maintain proper heat control; this prevents overheating and helps develop that perfect nutty aroma. Choosing the right pan sets you up for success in safely browning butter every time.
Seasoning Your Nonstick Pan to Improve Butter Browning
To get the best brown butter, you need to season your nonstick pan regularly by heating it with a bit of oil or butter. This builds a natural coating that helps your butter brown evenly without sticking or burning.
Just remember to clean gently and avoid abrasive scrubbers to keep that seasoned surface intact.
Benefits Of Pan Seasoning
A lightly seasoned nonstick pan can make a big difference in how your butter browns. When you keep your pan seasoned, you improve heat distribution, which means your butter heats evenly and browns consistently. This reduces hot spots that cause burning or uneven color.
Here are three benefits you’ll notice:
- A seasoned nonstick surface resists sticking, making browning butter easier and cleaner.
- Improved heat distribution ensures even browning, enhancing that rich nutty aroma you want.
- The micro-layer formed by seasoning fills microscopic scratches, preventing over-browning and reducing the need for excess butter or oil.
Seasoning Techniques Explained
Since proper seasoning enhances your pan’s performance, mastering the technique can make browning butter much easier and more consistent. To season your nonstick pan, apply a thin layer of neutral oil, then heat it over medium heat until it smokes slightly. This process fills microscopic pores, creating a natural nonstick surface that improves heat distribution and reduces hot spots.
Let the pan cool before wiping away any excess oil to avoid sticky residues that can interfere with butter browning. Avoid aerosol sprays and heavy oil use during seasoning, as they can cause buildup. By regularly seasoning your nonstick pan this way, you’ll achieve more even browning, making your butter turn golden and flavorful without sticking or burning.
Maintaining Seasoned Coating
Although seasoning your nonstick pan once is helpful, maintaining that seasoned coating regularly is key to consistent butter browning. The seasoned coating improves heat tolerance and prevents sticking, so you get even browning butter every time.
To maintain it effectively:
- Reapply a thin layer of oil like vegetable or flaxseed oil and heat the pan periodically to reinforce the seasoning.
- Avoid abrasive scrubbers when cleaning; gentle wiping preserves the seasoned coating.
- Always heat your nonstick pan gradually before adding butter to ensure an even surface temperature.
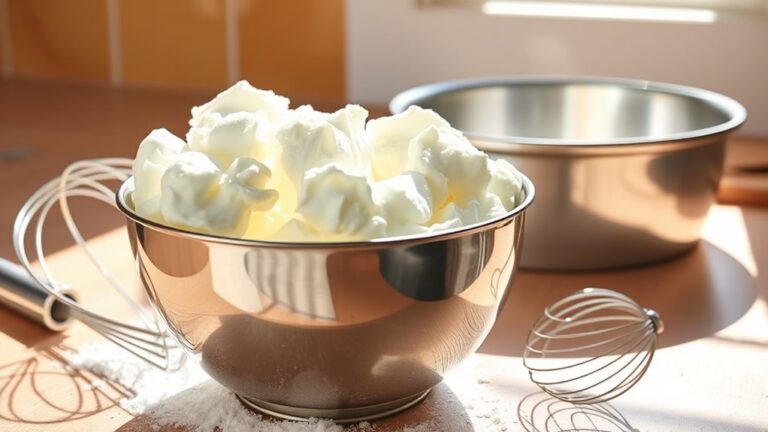
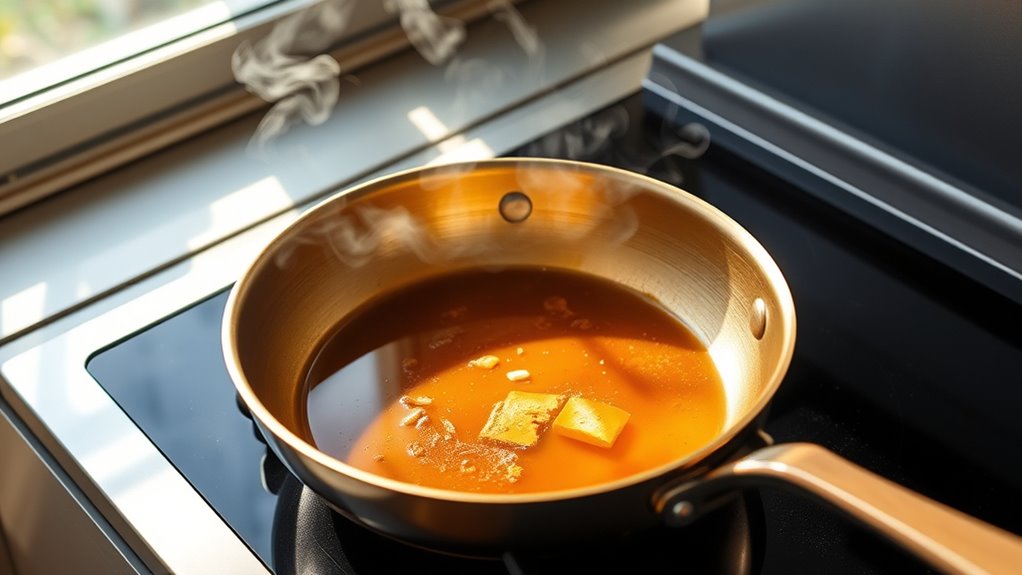
Melting Butter Properly for Perfect Browning
When you melt butter slowly over medium-low heat, you give it the best chance to brown evenly without burning. Start by cutting your butter into small, uniform pieces; this helps it melt consistently in your nonstick pan. Avoid cranking up the heat—high temperatures cause uneven browning and can quickly burn the butter, leaving a bitter taste.
Keep a close eye on the color as it melts: first, it’ll turn a light golden shade, then progress to a richer amber. Once it reaches that perfect browned hue and releases a nutty aroma, take the pan off the heat immediately to prevent over-browning. This careful melting process is key to achieving that delicious, nutty flavor without scorching your butter.
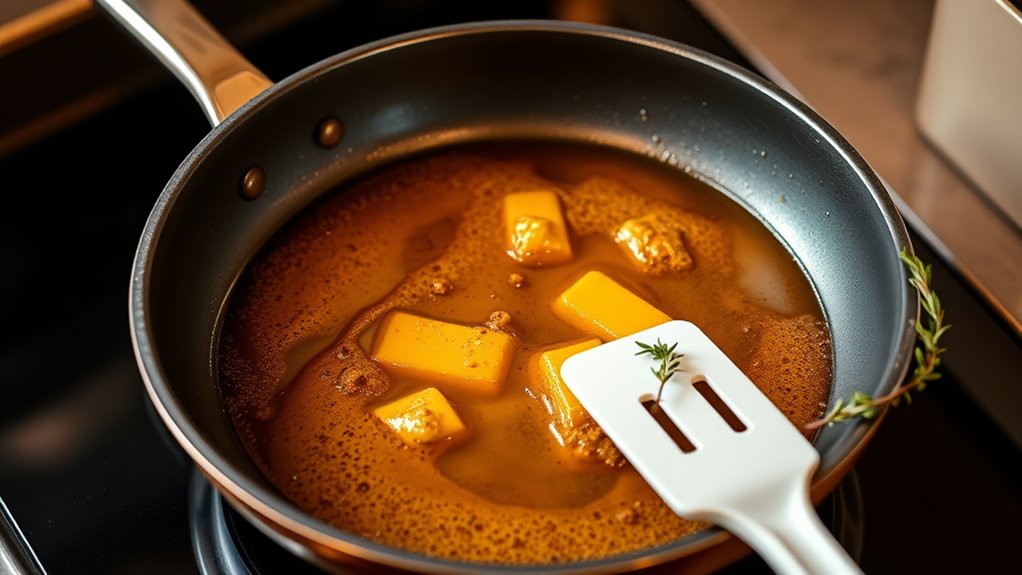
Stirring Tips to Prevent Burning and Ensure Even Color
To prevent burning and achieve an even color, you need to stir the butter constantly with a heatproof spatula or wooden spoon. When browning butter in a non-stick pan, maintaining medium heat is key to gradual, controlled cooking. Stirring constantly ensures the milk solids move around, avoiding hot spots and uneven browning.
Follow these tips for best results:
- Use medium heat to allow slow, even browning without rushing the process.
- Stir constantly to distribute heat evenly and prevent localized burning.
- Pay attention to the color shift; once it turns golden or light amber, remove the pan from heat immediately.
This method helps you master browning butter safely while getting an even, rich color every time.
Managing Heat to Avoid Overcooking Brown Butter
Because browning butter involves delicate heat control, you need to use medium-low heat and keep stirring constantly to prevent it from burning or overcooking. Maintaining medium-low heat ensures the butter melts evenly and browns gradually without scorching.
As you stir, watch for subtle color changes—from golden to deep amber—that signal it’s reaching the right stage. Don’t rely on time alone; the nutty aroma and color are your best guides. Once you see the perfect hue, immediately remove the pan from heat to stop residual heat from continuing to cook the butter.
Avoid sudden temperature spikes and keep stirring steady so heat distributes evenly, giving you safe, controlled browning and preventing the butter from turning bitter or burnt.
What to Do If Your Butter Starts to Burn
If your butter starts to burn, act quickly by removing the pan from heat to halt further cooking and bitterness. Burnt butter not only spoils the flavor but can ruin your dish. To salvage what you can and prevent burning next time, follow these steps:
If butter begins to burn, remove it from heat immediately to stop bitterness and save your dish.
- Remove from heat immediately to stop the browning process and avoid further darkening.
- Transfer the browned butter to a heatproof container to cool, stopping cooking and preventing burnt butter taste.
- Use a slotted spoon or spatula to skim off burnt milk solids, preserving the flavorful browned butter underneath.
If the butter tastes bitter or smells acrid, discard it to avoid unpleasant flavors. To prevent burning in the future, cook over medium-low heat and stir continuously.
How to Use and Store Browned Butter Made in Nonstick Pans
When you brown butter in a nonstick pan, you’ll want to keep a close eye on the heat and stir constantly to achieve that perfect deep golden color without burning. Once your brown butter reaches that nutty aroma and rich color, promptly remove it from heat to stop the browning process.
For storage, transfer the brown butter into an airtight, non-metal container and refrigerate—it will keep for up to two weeks. Avoid metal utensils when scraping the browned bits to protect your nonstick pan’s coating.
To extend shelf life, freeze brown butter in small portions, like ice cube trays, and thaw only what you need. When using refrigerated or frozen brown butter, gently reheat it to preserve its flavor and texture.
Frequently Asked Questions
Can I Brown Butter in a Nonstick Pan?
Yes, you can brown butter in a nonstick pan, but you’ll need to keep the heat low and stir constantly to avoid burning.
Watch carefully since the pan’s dark surface can hide the butter’s color changes.
What Pan Is Best for Browning Butter?
The best pan for browning butter is like a clear window—you’ll want a light-colored, heavy-bottomed skillet, such as stainless steel or enameled cast iron. This allows you to easily watch the butter’s color change and ensures it heats evenly.
Avoid dark pans, as they can make it difficult to see the butter’s progress and might lead to burning. A good pan helps you achieve that perfect nutty brown without any guesswork.
Is It Okay to Put Butter in a Non-Stick Pan?
Yes, you can put butter in a non-stick pan, but watch the heat closely. Keep it medium-low to prevent burning and safeguard the coating. Stir often to ensure even melting and avoid hot spots.
What Are the Common Browned Butter Mistakes?
You often burn milk solids by using too high heat or not stirring constantly. Overcrowding the pan and ignoring color changes lead to uneven browning.
Don’t wait too long—remove butter as soon as it smells nutty.
Conclusion
Now that you know how to brown butter safely in your nonstick pan, you’re ready to elevate every dish with that irresistible nutty flavor. Just remember: patience and the right heat are your best friends—no superhero could rescue burnt butter faster than you with these tips!
With a little care, your browned butter will be perfectly golden every time, adding a gourmet touch without the stress. Happy cooking, and enjoy that buttery magic!
Mastering the art of brown butter in a nonstick pan not only enhances your meals but also helps maintain your cookware’s quality. Keep these techniques in mind for safe and delicious results every time.