How to Make Peanut Butter Cookies Without Eggs Simply
You can easily make peanut butter cookies without eggs by mixing creamy peanut butter, sugar, and a bit of water or milk until smooth. This simple eggless peanut butter cookie recipe is perfect for those with egg allergies or when you’re out of eggs.
Gradually stir in flour to form a thick dough, then chill it briefly for easier handling.
Shape the dough into balls, press with a fork for that classic crisscross pattern, and bake at 350°F for 10-12 minutes until the edges turn golden.
These cookies come out soft, chewy, and full of rich peanut butter flavor.
For tips on perfect texture, flavors, and storage, keep exploring these simple steps to make the best eggless peanut butter cookies every time.
The 3 Essential Ingredients for Eggless Peanut Butter Cookies
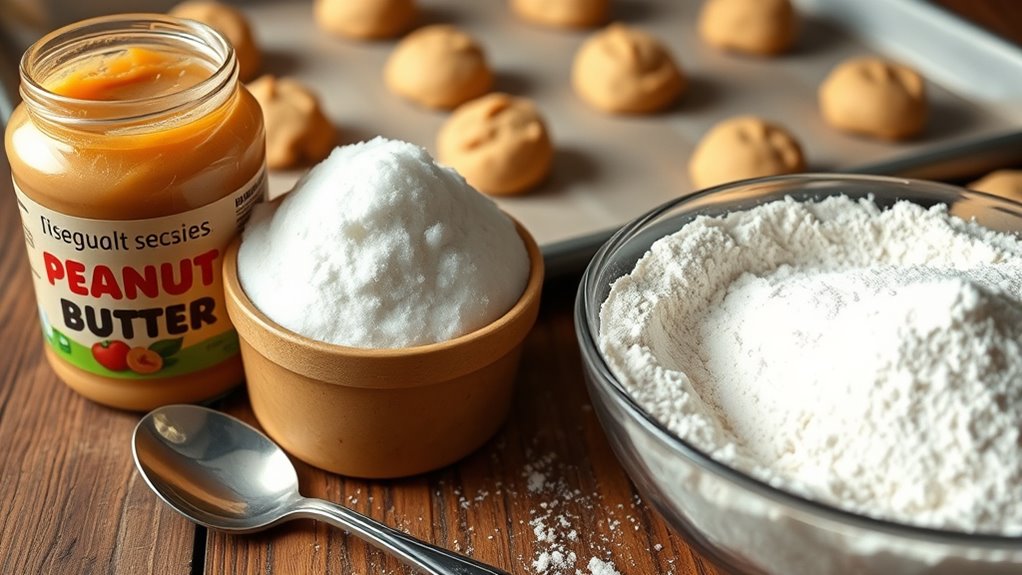
Although you’re skipping eggs, you still need three key ingredients to make delicious peanut butter cookies: peanut butter, flour, and sugar. These ingredients form the foundation of your eggless cookies, delivering the perfect balance of texture and moisture.
Choose creamy, hydrogenated vegetable oil peanut butter for the best flavor and smooth texture. All-purpose flour adds structure, helping your cookies hold together without eggs. Sugar doesn’t just sweeten; it also creates a crispy exterior that contrasts nicely with the soft, fudgy inside.
While some recipes add water or other liquids for extra moisture, the core ingredients remain peanut butter, flour, and sugar. By focusing on these essentials, you’ll achieve eggless cookies that are tender, flavorful, and perfectly textured every time.
Preparing the Dough
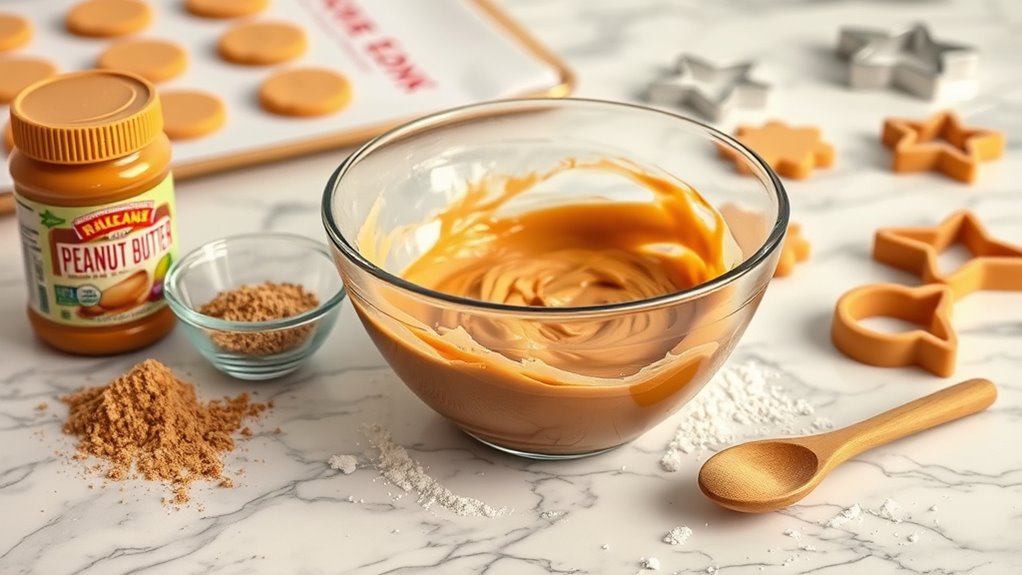
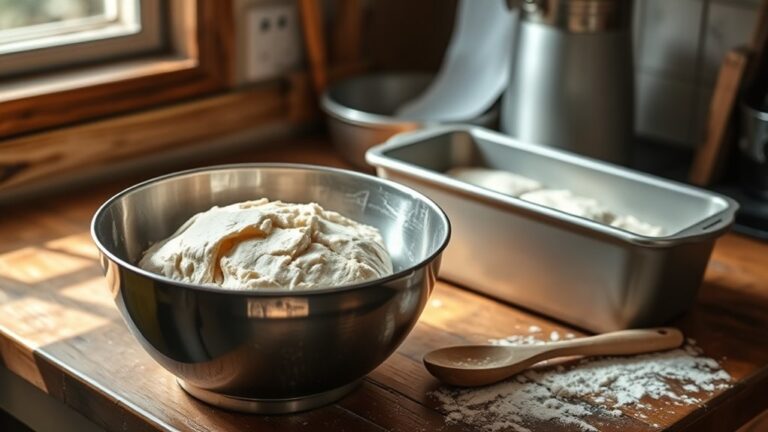
Start by mixing your peanut butter and sugar until smooth, then add water or milk to bring the dough together. Pay close attention to the dough’s consistency—it should be firm but pliable for easy shaping.
Chilling the dough for at least 15 minutes will make handling simpler and help your cookies hold their shape.
Ingredient Mixing Techniques
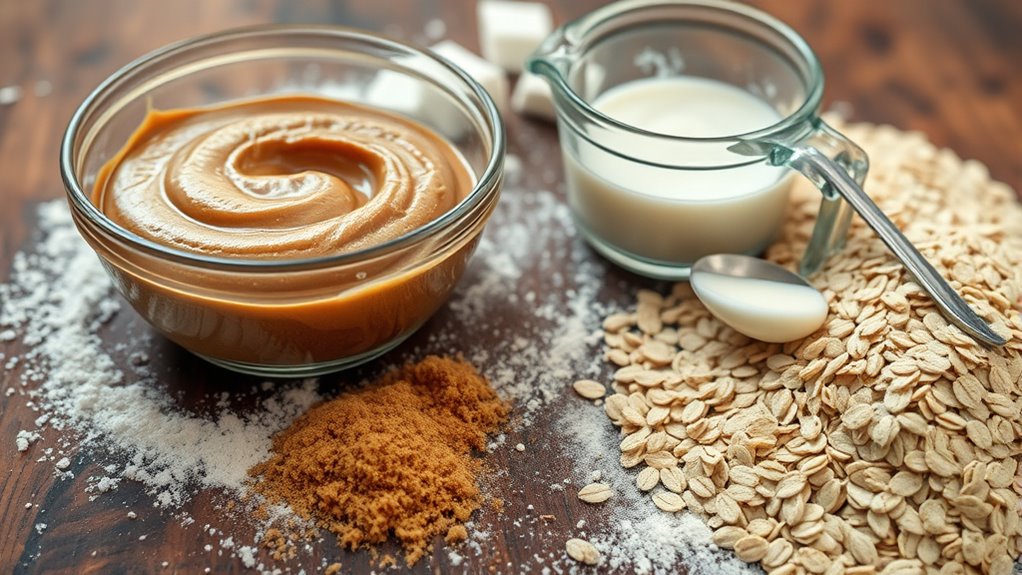
When you combine 1 cup of creamy peanut butter, ¾ cup of white sugar, and 2 tablespoons of water in a large bowl, mix them thoroughly until the texture is smooth and slightly thickened. Gradually add the all-purpose flour, mixing well after each addition to distribute the flour evenly and avoid lumps.
Use a spatula or whisk to incorporate the ingredients fully, scraping the sides and bottom of the bowl to spread the mixture uniformly. If you’re adding mix-ins like chocolate chips, gently fold them into the dough to distribute without overworking it.
This careful mixing guarantees all ingredients combine well, creating a consistent dough that’s ready for chilling, which helps improve handling and texture during baking.
Dough Consistency Tips
Once your ingredients are fully mixed into a smooth, uniform dough, pay close attention to its consistency. The dough should be thick and slightly sticky, allowing you to form balls easily without them spreading too much during baking. Achieving the right dough consistency depends on balancing peanut butter and powdered sugar to create manageable dough that holds together well.
If the dough feels too soft or greasy, add a little extra flour to improve its firmness and handling. Proper manageability means the dough won’t be too stiff or overly sticky, making shaping easier. Remember, chilling the dough for some time helps firm it up, but even before that, focus on adjusting the firmness to ensure smooth handling and perfect cookie shape.
Chilling For Easier Handling
Although you can shape the dough immediately, chilling it for at least 15 minutes makes handling much easier. When you refrigerate the dough, it becomes firmer and less sticky, so you can scoop or roll it into balls without frustration. To prevent drying out, wrap the dough tightly in plastic wrap before placing it in the fridge.
Chilling not only helps you handle and shape the dough better but also improves the cookie’s texture by reducing spreading during baking. For even richer flavor and a firmer consistency, you can refrigerate the dough for up to 72 hours. This longer chilling time enhances the final cookie’s texture, making it chewy and more enjoyable.
Shaping Your Cookies
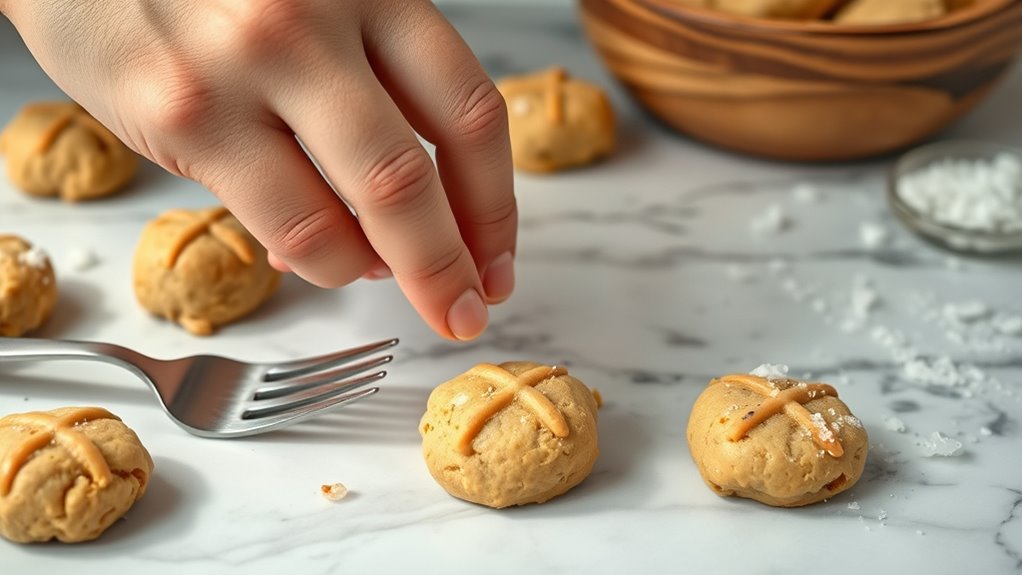
Start by rolling your dough into evenly sized balls and spacing them about 2 inches apart on your baking sheet. Use a fork to gently press each ball down, creating that classic crisscross pattern without sticking.
Chilling the shaped cookies before baking helps them keep their shape perfectly.
Dough Handling Tips
When you’re ready to shape your peanut butter cookie dough, chilling it for at least 15 minutes will make handling much easier. Proper dough handling is key to shaping your cookies evenly and without frustration. Use a tablespoon or cookie scoop to portion uniform dough balls, ensuring consistent baking.
If your dough feels too soft, refrigerate dough for another 10-15 minutes before shaping to prevent sticking. Lightly flour or oil your hands to roll the dough smoothly. Once shaped, gently press with fork to create that classic crisscross pattern.
These soft dough tips help maintain your cookie’s form and texture while making the process clean and simple. Following these steps guarantees perfectly shaped cookies every time.
Fork Crisscross Pattern
After chilling your dough and shaping it into uniform balls, you’ll want to add the signature fork crisscross pattern. To do this, dip a fork in sugar to prevent sticking, then gently press it straight down onto each cookie twice, creating intersecting lines. This pressing shapes the cookie’s surface while flattening it just enough to help the cookies bake evenly.
Be careful not to press too hard, or you’ll flatten the cookie excessively. The chilled dough makes this step easier and ensures the pattern stays intact during baking. This classic fork crisscross pattern not only adds visual appeal but also plays a role in shaping your peanut butter cookies perfectly without eggs, giving them that traditional look and texture you’re aiming for.
Baking Sheet Spacing
How far apart should you place your peanut butter cookies on the baking sheet? You’ll want to space them about 2 inches apart to allow for spreading during baking. Proper spacing on the cookie sheet prevents your cookies from merging and guarantees they bake evenly with a nice, consistent brown.
Using a consistent scoop size helps you maintain uniform cookie placement and size, so your cookies spread evenly without overcrowding. Lining your baking sheet with parchment paper also helps with easy removal and even heat distribution.
For best results, leave at least one to two finger widths between each cookie. This careful spacing ensures your peanut butter cookies bake perfectly, achieving the texture you want—whether crispy or soft—without sticking together or baking unevenly.
Baking Time and Temperature for Perfect Cookies
Although baking times can vary slightly depending on your oven, you’ll want to bake your peanut butter cookies at 350°F (180°C) for 10 to 12 minutes to get the perfect texture. Start checking at 10 minutes to avoid overbaking.
Baking less than 10 minutes creates a chewy texture, while closer to 12 minutes gives crispy edges. After baking, let cookies cool on the sheet for 5-10 minutes to set.
| Baking Time | Cookie Doneness | Result |
|---|---|---|
| Under 10 minutes | Softer, chewier | Thick, tender cookies |
| 10 minutes | Slightly set edges | Balanced texture |
| 12 minutes | Crispy edges | Thinner, crispier cookies |
| Over 12 minutes | Overbaked | Dry, hard cookies |
Adjust oven settings accordingly for your ideal peanut butter cookies.
How to Get the Ideal Soft and Crispy Texture
To nail the perfect balance between soft and crispy, you’ll want to watch your baking time closely and pull the cookies out when the edges turn golden but the centers stay soft.
Letting them cool on the baking sheet helps firm up the outside while keeping the inside tender.
Balancing Moisture And Crispness
When you bake peanut butter cookies for 10 to 12 minutes until the edges turn golden but the centers stay soft, you create the perfect balance between moisture and crispness. To maintain this balance, add a small amount of water or milk to your dough; this keeps moisture in without making the cookies too soft.
Swap white sugar for brown sugar to enhance moisture retention and develop a slightly crispy exterior. Don’t skip chilling the dough before baking—it prevents spreading, helping the edges stay crisp while the center remains tender.
After baking, let your cookies cool completely on a wire rack; this step locks in crispness on the outside while preserving that fudgy, moist interior you want in every bite.
Optimal Baking Time
If you want peanut butter cookies with a soft center and crispy edges, aim for a baking time of 10 to 12 minutes at 350°F. Keep an eye on the cookie doneness; remove them once the edges turn golden brown to maintain a tender, fudgy cookie texture. Baking longer, around 14-15 minutes, will yield a firmer, crispier result, while shorter times keep cookies softer.
Cooling And Storage Impact
Although baking sets the foundation, how you cool and store your peanut butter cookies plays a crucial role in achieving that perfect balance between a soft center and crispy edges. Start by letting your cookies cool on the baking sheet for 30 minutes; this helps set a soft interior.
Then, transfer them to a wire rack for cooling to prevent steam buildup, preserving the crispy exterior. For storage, keep your cookies in an airtight container at room temperature for up to three days to maintain their texture.
If you want extra crunch, refrigerate or freeze them after cooling, then warm slightly before serving. Remember, baking until the edges are lightly golden and cooling completely before storage ensures the ideal soft interior with a crispy exterior every time.
Simple Ingredient Swaps for Your Diet
Since everyone’s dietary needs differ, you can easily swap ingredients to make peanut butter cookies that suit your preferences. For eggless and vegan peanut butter cookies, use natural peanut butter with simple ingredients as your base. Replace eggs with binder alternatives like flaxseed gel or applesauce to keep the dough moist and cohesive.
If you want dairy free options, try plant-based yogurt instead of regular yogurt. Sweeteners like maple syrup add moisture and complement eggless baking.
| Ingredient Purpose | Swap Options |
|---|---|
| Egg Binder | Flaxseed gel, applesauce |
| Peanut Butter Base | Almond, cashew, sunflower seed |
| Sweetener | Maple syrup, honey |
| Moisture Enhancer | Plant-based yogurt |
These ingredient swaps let you customize your cookies while keeping them simple and delicious.
Flavor Variations and Mix-Ins to Try
When you want to elevate your eggless peanut butter cookies, adding mix-ins like chocolate chips, chopped nuts, or shredded coconut instantly boosts both flavor and texture. Try stirring in a teaspoon of vanilla extract or flavored extracts like almond or maple for a subtle twist.
Swirling in fruit preserves or small dollops of melted chocolate before baking creates delightful surprises in each bite. For added crunch and contrast, toss in crushed pretzels or an assortment of nuts and seeds.
If you’re feeling adventurous, mix mini marshmallows into the dough to introduce a gooey texture. These simple variations let you customize your cookies without changing the base recipe, keeping them moist and delicious every time.
Best Storage Methods to Keep Cookies Fresh
To keep your peanut butter cookies fresh and delicious, store them in an airtight container at room temperature, where they’ll stay good for up to six days. Choosing the right storage method is key to maintaining freshness and texture preservation. Here’s what you can do:
Store peanut butter cookies in an airtight container at room temperature for up to six days to keep them fresh and tasty.
- Room Temperature: Use an airtight container to keep cookies fresh for up to six days. Make sure they’re completely cooled before storing to avoid moisture buildup.
- Refrigerate: For longer freshness, refrigerate cookies in an airtight container for up to two weeks, which also helps keep their texture intact.
- Freeze: Layer cookies with parchment paper in a freezer-safe container or bag and freeze for up to two months. Thaw at room temperature before serving.
Keep cookies away from sunlight and humidity to preserve their best quality.
Creative Ways to Serve Your Cookies
Although peanut butter cookies are delicious on their own, you can elevate their flavor and presentation with a few creative serving ideas. Try drizzling melted chocolate or caramel over your eggless peanut butter cookies for a rich twist.
Turn them into delightful cookie sandwiches by layering ice cream or jelly between two cookies—a perfect peanut butter treat. For a crunchy contrast, crumble cookies over yogurt or oatmeal.
Add a sprinkle of sea salt or crushed nuts as creative toppings to enhance texture and flavor. Pair your peanut butter cookies with cold milk, coffee, or tea to bring out their nutty richness.
These simple dessert presentation tips will transform your treats, making every bite an irresistible experience.
Why You’ll Love Eggless Peanut Butter Cookies
Serving your eggless peanut butter cookies in creative ways highlights their unique texture and flavor, but the cookies themselves offer plenty to love. You’ll appreciate this egg-free recipe because:
- They boast a rich fudgy interior with a crispy exterior, creating a delightful melt-in-your-mouth experience.
- They’re perfect for anyone with dietary restrictions or egg allergies, making them inclusive and accessible.
- They’re quick and easy to make, requiring just three simple ingredients and less than 30 minutes, so you can enjoy fresh cookies anytime.
These eggless peanut butter cookies deliver classic peanut butter flavor with a hint of sweetness, satisfying your cravings without the hassle of eggs.
Whether you’re baking for yourself or others, this recipe guarantees delicious results every time.
Frequently Asked Questions
What Can I Substitute for Eggs in Peanut Butter Cookies?
You can substitute eggs with flax eggs, applesauce, mashed bananas, or yogurt. Flax eggs offer the best binding, while fruits add moisture and sweetness, making your peanut butter cookies soft and delicious without changing the texture too much.
What Can I Use in Place of an Egg When Making Cookies?
You can use flaxseed or chia seed gel, applesauce, mashed banana, yogurt, or aquafaba to replace eggs in cookies.
These options help bind ingredients and add moisture, keeping your cookies soft and tasty without eggs.
How to Make Cookie Dough With 3 Ingredients?
Like a painter with a simple palette, you mix 1 cup peanut butter, 1 cup sugar, and 1 cup flour. Stir until dough forms, chill briefly, then shape and bake.
Voilà, three-ingredient cookie magic!
Can I Bake Cookies Without Eggs and Butter?
Yes, you can bake cookies without eggs and butter by using peanut butter, oil, or applesauce. These ingredients help bind and add moisture, so your cookies stay soft, chewy, or crispy just the way you want.
Conclusion
You might worry eggless cookies won’t hold together, but trust me—they’re just as soft and chewy as traditional ones. By following these simple steps, you’ll create peanut butter cookies that bake perfectly every time, with that irresistible golden crisp edge and melt-in-your-mouth center.
Imagine pulling a warm batch from the oven, the sweet aroma filling your kitchen, ready to enjoy without any fuss or eggs. It’s easier and tastier than you think!
With these tips, making peanut butter cookies without eggs simply becomes a delightful and rewarding experience. Enjoy your eggless peanut butter cookies that are soft, chewy, and full of flavor every time!